 Last updated by James McBryan on 09/21/2021
Hours can be reset manually every school year or they can be set up to reset automatically by setting up milestones on a custom time period (ex: annually on a school calendar).
When the new start date is set, all of the charts and reports are offset but the former hours are not deleted. They can still be accessed in the future, but won't be part of the current charts and reports.
RESETTING THE START DATE MANUALLY
If you’d like to reset your start date manually each school year:
1. Go to your Organizer Dashboard

2. On the Settings page, click on More Settings
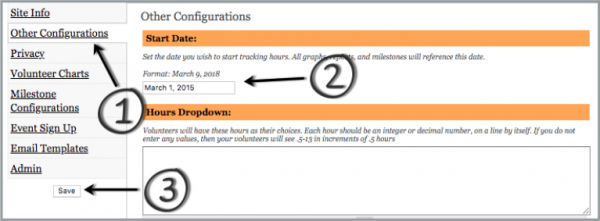
3. Click on the Other Configurations tab, and set your new Start Date to be the beginning of the School Year. For Example: If the school runs from August 20 - June 1, then set up your start date on August 19 (or a few days earlier).
4. Then click on Save.
The following year, just push your start date one year further.
SETTING UP AN AUTOMATED RECURRING TIME PERIOD
If you’d like for your site to reset automatically every school year, you can set up a custom milestone timeframe:
1. Go to your Organizer Dashboard

2. On the Settings page, click on Milestones
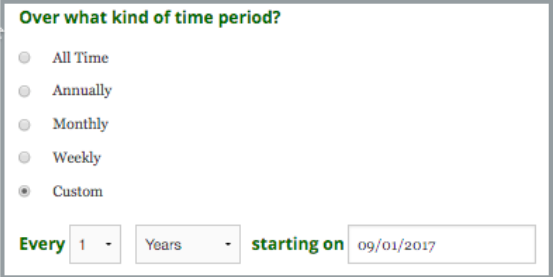
3. In the question "Over what kind of time period?" Select Custom.
4. Then set your frequency to Every ( 1 ) (YEAR) starting on (the beginning of the school year).
For Example: If the school runs from August 20 - June 1, then you would set it up as Every (1) (Year) starting on (08/19/18)
The changes will be automatically saved on their own and every year the calendar will reset after the time period ends.