If you need to keep your volunteer’s accountable for their time commitments, you want to use our flexible milestones system. Set milestones for any set of hours, for any type of volunteers, for any type of data, and for any time period.
To set milestones you want to head over to Organizer Dashboard >> Settings >> Milestones
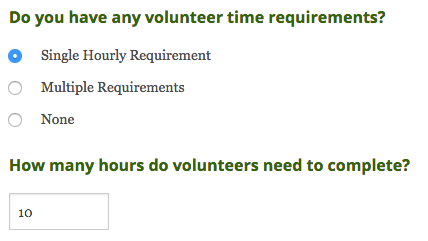
Single Requirement Scenario
If you have a very simple volunteer requirement, like 40 hours per volunteers, then just select a single requirement, set your hours, and you’re ready to go.
Detailed or Multiple Requirements Scenarios
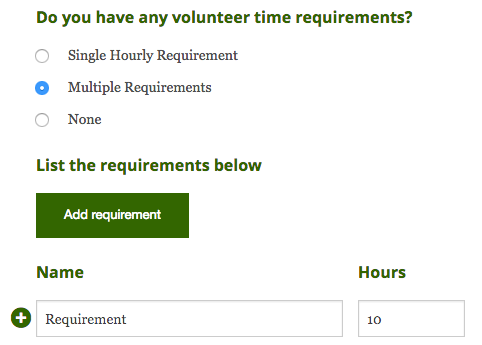
However, if you have anything that is slightly more detailed than that, select “Multiple Requirements”.
Some examples of different type of milestone combinations that are possible on our system:
- Set different milestones for volunteers in different categorizations (like married families versus single families)
- Have milestones apply to only certain activity types (like for time requirements for non-meeting time)
- Track milestones beyond hours (like for donations)
- Set achievement levels for different hour levels (like a bronze, silver, gold progression)
We’ll go over each of those in a bit! But first let’s go over all the different configurations
Configuring milestones
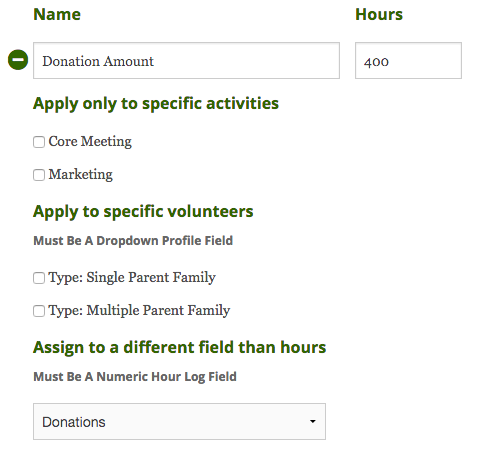
When you add milestones, you have to always add a name of the milestone and the amount of hours. There’s a “plus” sign that gives you 3 different options:
- Apply only to specific activities
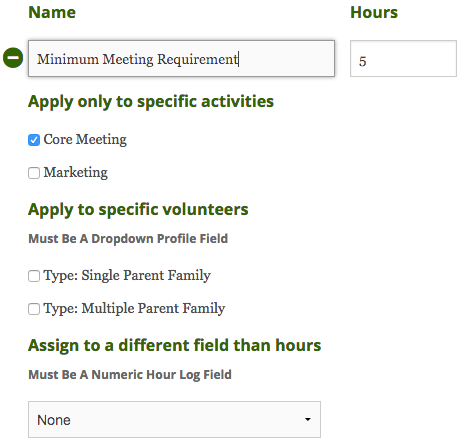
- When a volunteer submits an hour, it is categorized with some activity. If you select specific activities to apply only to the milestone, then only hours that are of these activity types will be counted.
- Apply to specific volunteers
- You can categorize volunteer through dropdown profile fields. If you select the specific values of those profile fields to apply only the the milestone, then only volunteer’s that have that categorization will see this milestone.
- Assign to a different field than hours
- You can add different fields by adding numeric fields to the hour log. By default, milestones use hours but you can point it to a different numeric field to be based off of.
- You can add different fields by adding numeric fields to the hour log. By default, milestones use hours but you can point it to a different numeric field to be based off of.
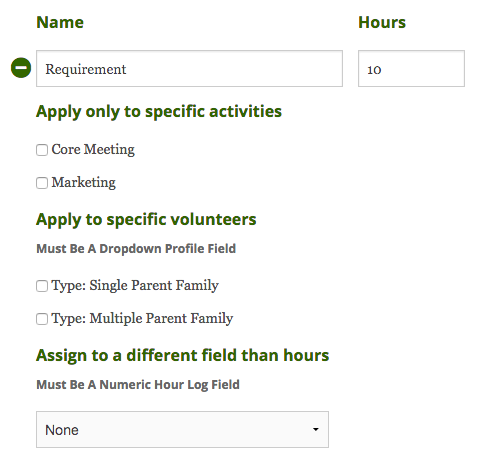
Note that milestones with the exact same configuration will show up in a progressive group together. If they are different, they’ll show up in different groupings.
Set different milestones for volunteers in different categorizations
There are situations where volunteers have different requirements. Some scenarios include where we see volunteers tracking different hours
- Single Parent Families, Military Families, and Two Parent Families
- Preschool parents and Elementary school parents
- Honor students, IB Students, and Non-honor students
- Board members and regular volunteers
To set this up, follow these instructions:
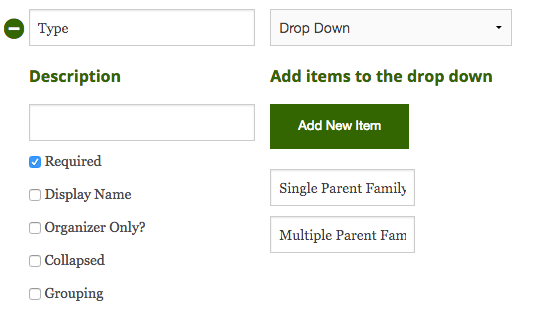
- Create a volunteer categorization: Go to Organizer Dashboard >> Settings >> Profile Fields and add a dropdown field with your desired categorization
- Create a milestone for each categorization: Go to Organizer Dashboard >> Settings >> Milestones and set the name of the milestone and the hours
- Link up the volunteer categorization to the milestone: For each milestone, click the “plus” sign and check the profile fields that the milestone should apply to
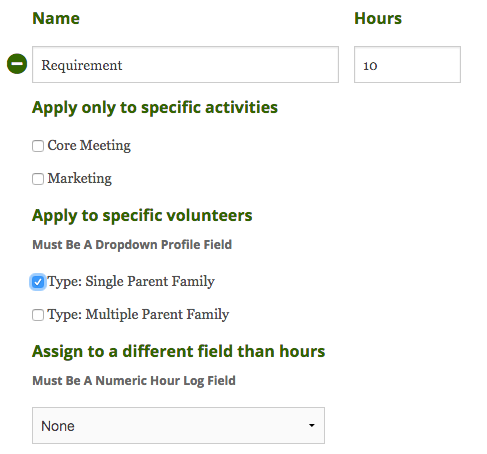
- Categorize the volunteers: You can do this individually or in bulk in Organizer Dashboard >> Volunteers
Have milestones apply to only certain activity types
Sometimes your organization might have two or three different type of requirements for the different activities the volunteer does. For example:
- 20 hours of field work and 30 hours of back end computing work
- 10 hours of traffic duty and 40 hours of all other activities
- 15 hours continuing education credits and 20 hours of professional development credits
To set this up, follow these instructions:
- Set up your activities: Go to Organizer Dashboard >> Settings >> Hour Log and categorize your submissions and fill out some categories
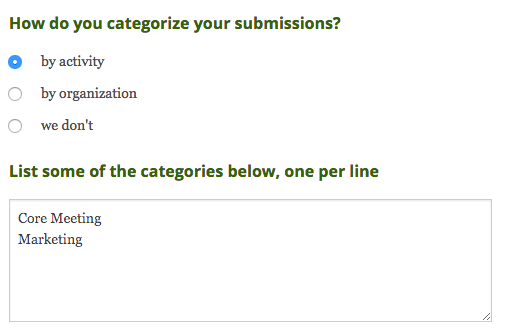
- Create milestones for each of the activity combinations: Go to Organizer Dashboard >> Settings >> Milestones and set the name of the milestone and the hours
- Set the activity filters: For each milestone, click the “plus” sign and check the activities that the milestone should only track against
Track milestones beyond hours
You may have different requirements beyond hours that the volunteer should be tracking:
- Money Donations
- Objects Brought
- Events Attended
To set this up, follow these instructions:
- Set up your other field: Go to Organizer Dashboard >> Settings >> Hour Log and create an “extra” numeric field
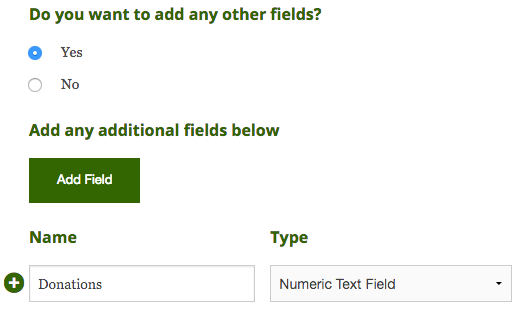
- Create a milestone for the requirement: Go to Organizer Dashboard >> Settings >> Milestones and set the name of the milestone and the quantity (it says hours, but ignore that for the time being)
- Set the other field on the milestone: For each milestone, click the “plus” sign and assign the milestone to the numeric field
Set achievement levels for different hours
Having progressive milestones help volunteers work toward their hours. We’ve seen setups like:
- Bronze Level, Silver Level, Gold Level
- Pro Bono Distinction, High Pro Bono Distinction, Highest Pro Bono Distinction
- Minimum Requirement, Honors Cords Candidate, Commitment Award at Graduation Candidate
To set this up, follow these instructions
- Create milestones for the different levels: Go to Organizer Dashboard >> Settings >> Milestones and set the name of the milestone and the hours
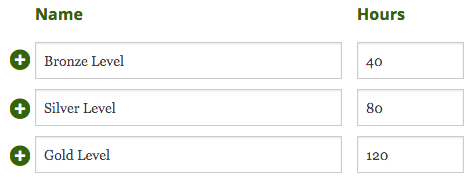
- Make sure they are in the same grouping: The details in “plus” sign must be exactly the same, either filled out the same or completely empty
 Last updated by